
20. March 2026
Fool-proof Sourdough Recipe

Oh, we’ve all been there! You pour your heart into making a starter from scratch or nurturing one a friend shared, and after five attempts that just didn’t go as planned, you might be feeling tempted to throw in the towel on that dream of perfect, airy sourdough. But guess what? I have some great news for you! This recipe has been tried and tested by my friends, their parents, and, most importantly, me, one who does not have patience and get will forget I am making a loaf of bread.
I promise this recipe will boost your confidence with sourdough and it works every single time. Plus, it’s super simple and makes for a fantastic base for you to start getting creative!
Let’s dive right in because I’m not here to share my life story when we could be baking up some delicious bread together!
Ingredients
- 750g Warm Filtered Water
- 250g Active Sourdough Starter
- 30g Salt
- 1000g Bread flour (I use Laucke Wallaby Bakers flour, but you can use any High Protein Flour)
Method
1. Mix warm water and sourdough starter.
2. Add salt and mix.
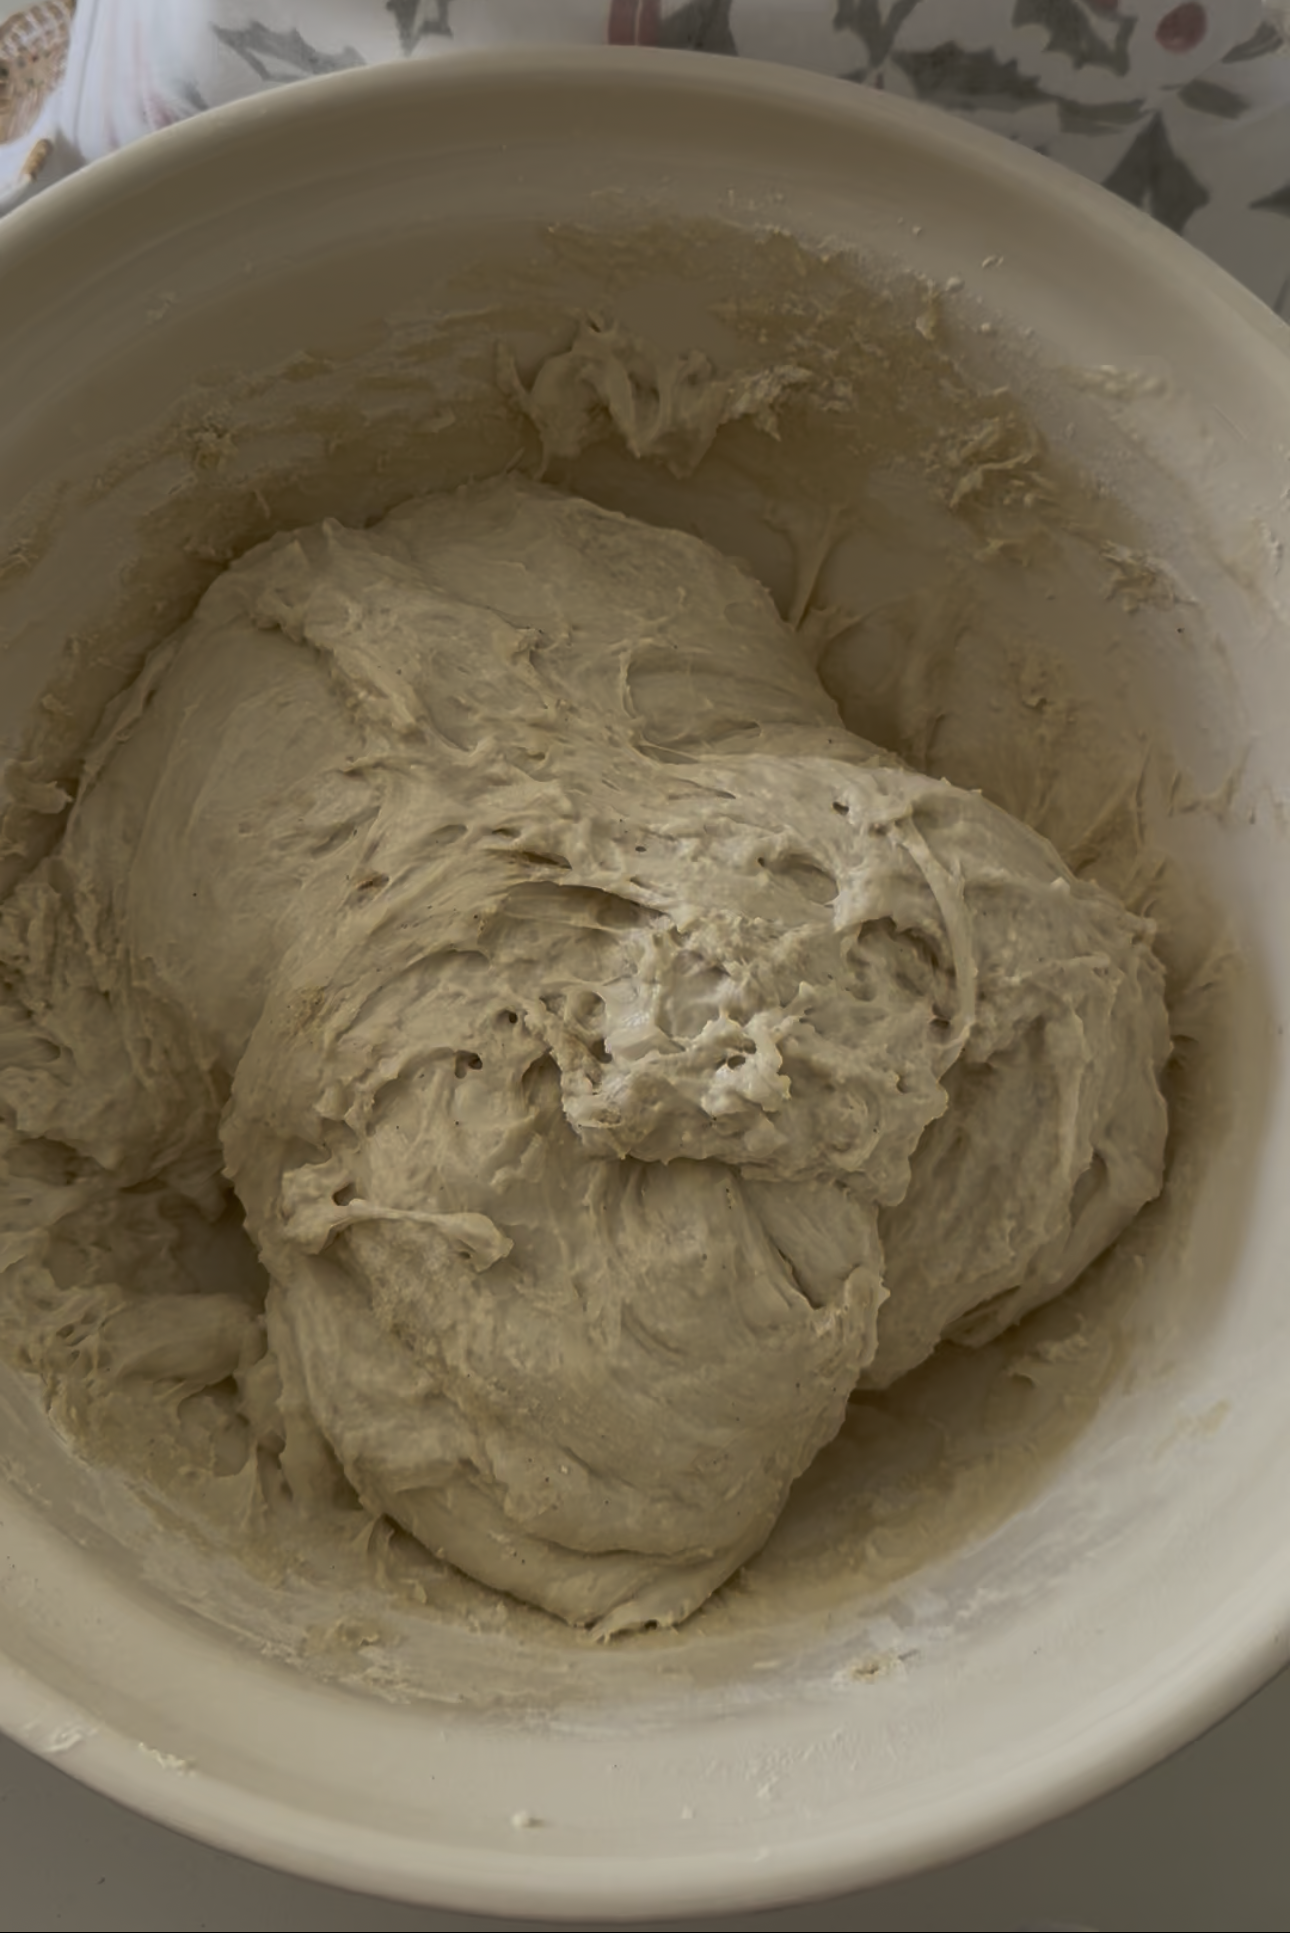
3. Add in the flour, combine well. I know you have heard of shaggy dough, but it really isn't necessary. Knead it well either by hand or using a dough hook on a stand mixer.
4. Perform 4 sets of stretch and folds, every 30 minutes for 4 hours.
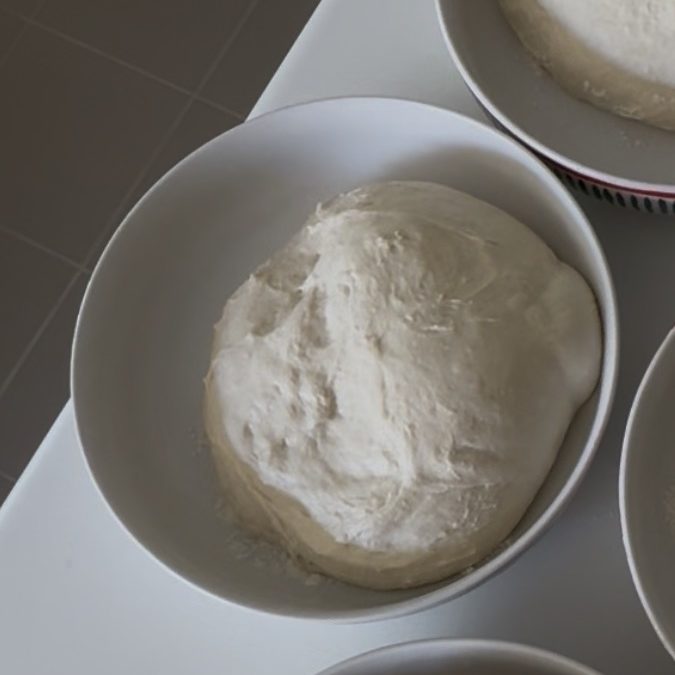
5. Leave on counter to bulk ferment for 4 hours.
6. Split the dough into 2 loaves and shape. (I like the zip and roll method but the ball works great too.)
7. Refrigerate for 2 hours up to 4 days depending on when suits to bake the loaf. (I like to make the dough so that I can bake it fresh in the morning).
8. When ready to bake, pre-heat oven to 230 degrees Celsius with the cast iron / loaf tin inside.
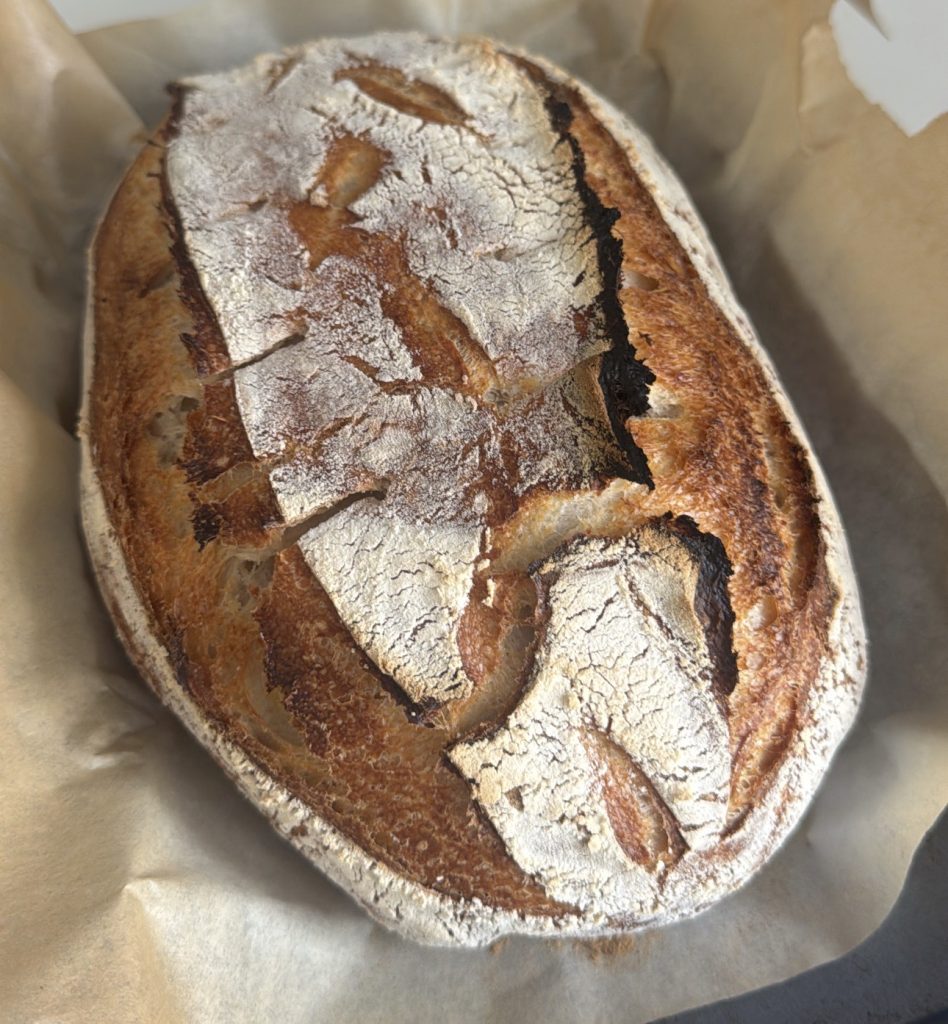
9. Once heated, score and place loaf inside with the lid on for 20 minutes, then remove the lid or do the rotate method. (More on that down below) for another 20 minutes and the top is nice and golden brown.
10. Once out, let it cool completely before cutting. (This ensures your loaf does not dry out or go stodgy, plus the crumb looks better once cooled.)
The Rotate Method
I like using the rotate method because I am usually baking 2 or more loaves at a time and 1. I only have one cast iron and 2. I do not want to be running the oven for 4+ hours at a time.
The rotate method is simple, all you need is 1 cast iron and 1 baking tray.
At the 20-minute mark, instead of removing the lid from loaf 1, take it out and place it on the baking tray. Loaf 2 can then go in the cast iron with the lid on and after 20 minutes loaf 1 is ready to cool, loaf 2 goes onto the baking tray and loaf 3 and start in the cast iron.